Tuesday, February 16, 2016

New Ventures: Bridal Hair and Makeup


Recently, one of my long-time friends got hitched and I couldn't have been more tickled when she asked me to style her hair and makeup since that is actually one of my favorite hobbies.


Photo cred: mystorykeeper.com

Photo cred: mystorykeeper.com

Photo cred: mystorykeeper.com

Beautiful little bridey!
Their ceremony was very sweet with a brunch theme which, let's be honest, is the best meal of the day. Needless to say, it was a big success and I wish her and her new husband tons of happiness in their new life together.


Below, I've outlined a few tricks to keep your wedding look (or long workday look) fresh from am to pm and will also photograph beautifully! 

1. PRIME. 
Just like laying the foundation to stabilize your house, your makeup needs a no-slip grip to stay in tip top shape. May I suggest one of these two:
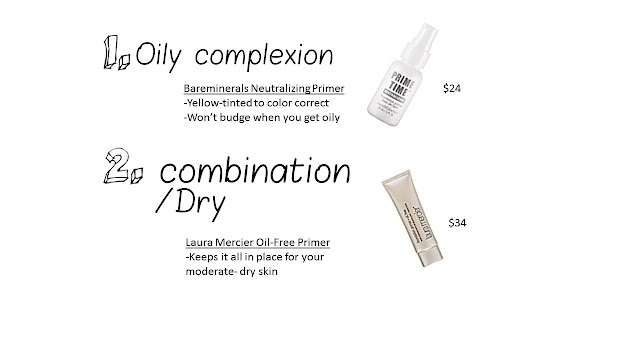

sephora.com


2.Next for your journey to #flawless makeup, choose your preferred makeup path.

It totally depends on your skin type, how much coverage you like, the length of time you'll need to have makeup on, and the finished look you have in your mind's eye.
                 Liquid= Complete coverage, feels a bit thicker, wears less evenly (especially if you're oily).    
                 Powder= Mid-light coverage, even wear for most brands (you can even go drugstore brands here. Think Physicians formula), but may not last as long depending on your skin type.

DRY SKIN BABES: use liquid as your skin already struggles to maintain moisture.
My SUPER oily ladies: powder is your bestie.

For the sake of this blog entry, I'm choosing liquid as I think that's the overall best choice for special occasions. ***If you go mineral powder, conceal under eyes first, powder there with your pressed powder (see below for suggestions), conceal your spots, and finally your powder foundation. Then continue steps below ***

2. Foundation

Use a foundation brush (mine is from target and works great) and apply in a circular motion. move product under your jawline, to your hairline, bush onto earlobes, but leave your under eye area CLEAR! Jaclyn Hill has a great tutorial for this if you're interested. LOVE her. 

Again, consider your skin type here, but Urban Decay Naked is a high definition foundation that is usually a good go-to for most skin types. Hourglass is another flawless brand for liquid makeup. 
Image result for sephora naked foundation
Find it here


3. Conceal
Meet the best kept secret of the concealing world. Urban Decay, if you're unfamiliar, is a thorough brand that has true lasting power and this little guy is no exception. Works flawlessly under both powder and liquid foundation to highlight and brighten while completely hiding any blemishes or discolorations. 


http://www.sephora.com/naked-skin-weightless-complete-coverage-concealer-P392854?skuId=1678937

Go one shade lighter than your foundation and follow this concealing example as a guideline. Under the eyes and around the edges of the nose are my key points. 


Placing 6-8 light dabs  in this triangle area (a little goes a LONG way here), and using my ring finger, I gently dab and work the product as I feel the warmth of your finger helps. Feel free to use a beauty blender like this one for simple application.


4. Set it and forget it: Powder
If you're going to splurge on one thing, this is it. The thing about spending a little extra on the good stuff is that it usually has better staying power, has 2-3 x's the lifespan of drugstore products, and looks better on your skin so don't be afraid to have 1 or 2 products that cost more than your Saturday night out. SAY IT WITH ME.... makeup is an investment.

Okay, the powder you need is Bobbi Brown's Translucent Powder. Go 1-2 shades lighter than your skin tone. This will guarantee you a 'Yes I got 12 hours of sleep' look. I use pale yellow since having a yellow-ish tint corrects redness which most women have due to hormones. 
Bobbi Brown Sheer Finish Pressed Powder, 0.38 oz
Find it here
5. The BBH: Bronzer, Blush and Highlight
I prefer to 'sculpt,' if you will, using powder rather than liquid. I just find it easier and faster to get right. Here's an example of where to place the color on your face:
Again, Jaclyn Hill is great at video tutorials for more help :)

The three products shown below are my top pics, even for olive to mocha skin, because they are very buildable and flatter most skin tones in my opinion. BareMinerals bronzer in Warmth is a flat, no shine tan color which is perfect for contouring or just adding a bit of summer to your skin tone. Nars blush in Orgasm has some sparkle and adds the most gorgeous natural hint of color. Becca highlighter in Opal is my favorite product out there. Somehow it creates this 'lit from within' look and gives you the most radiant bridal glow. Must have.
Find them here

6. Brows
NYC brow set
$5 at most drugstores. Works like a charm. The trick here is to dab your bush in the wax (a little goes a long way), dab the brush in your preferred color, then gently swipe onto your brows for a natural look. Try not to 'draw' on your brows, but enhanced the hairs that are there. don't put color where there isn't any hair. Perfect for light or dark brows.
Nyx Cosmetics Eyebrow Cake Powder

7. Eyes! Here's my trifecta for every bridal look you could want: Natural, Dewy, Bold.... anything!

     1. Urban Decay Naked 2 Palette
     2. Loreal liquid liner in black *drugstore* (if you're planning to use false lashes) or Urban Decay 24/7 pencil liner in Demolition otherwise
     3. Lancome Hypnose Mascara in black(great for everyday use too)

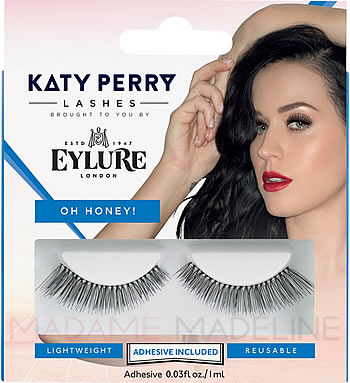
If you go the falsies route, my favorite is the Katy Perry 'Oh, Honey'
I used to pick mine up at Ulta, but you could find them in most drug stores.


Katy Perry Lashes - Oh Honey (New Packaging)


8. SET
It's the top of what I call a makeup sandwhich. You started with your no-slip base, added the colors you like, now time to cap it off with setting spray. My go-to is (of course) made by Urban Decay. Didn't realize what a fan I was of their products until writing this, but their stuff just works best in my experience. Spritz the 'All Nighter' spray all over your gorgeous face (4-5 pumps) and POOF! You should smudge even if you break a sweat. Don't forget the lip gloss before your photo sesh! ELF actaully makes some wonderful colors and has a bit of staying power itself. For a splurge, go with Marc Jacobs


Now you can enjoy your bridal moments without worry or fear of melting or sweating through your dewy look. Have fun, bridey!


Thursday, May 21, 2015

Wedding Gifting Guide 101

What a happy couple they are!
Let's help them stay that way with any of these lovely gift ideas


1. ANYTHING from their registry

Seriously... anything. As an engagement gift or as part of their wedding gift, it's good practice to grab something from their registry. I mean, it's there for a reason. When we were engaged, I checked our registries more than I checked Instagram. Any bride will tell you it's like Christmas morning to see things disappear from your wish list knowing someone truly understands that you need that kitchen Aid or those Kate Spade toasting flutes.

If you're not sure where to check for the engaged couple's registry, try these popular retailers first:

www.nordstrom.com
 Pottery Barn
www.potterybarn.com
 Crate and Barrel
www.crateandbarrel.com
2. Honeymoon Treats
Find out where they're going on their honeymoon and if they have a honeymoon registry. If so then you can go to that site and select a treat for the couple to have while they're there (like a candle light dinner for 2 or bottle of bubbly). If the couple is going to an all-inclusive resort, but didn't register, you can go through their resorts website to pre-pay for the gift of your choosing. They'll love it, I assure you!
In the case that the couple is traveling abroad or to a local spot, you can call ahead to their hotel and have chocolate strawberries or wine waiting on them when they arrive. You'll be the FIRST thank you note they send out once they return. 
 Honeymoon Fund
Honey Fund


3. Things everyone can love!

The gift of no carpel tunnel 
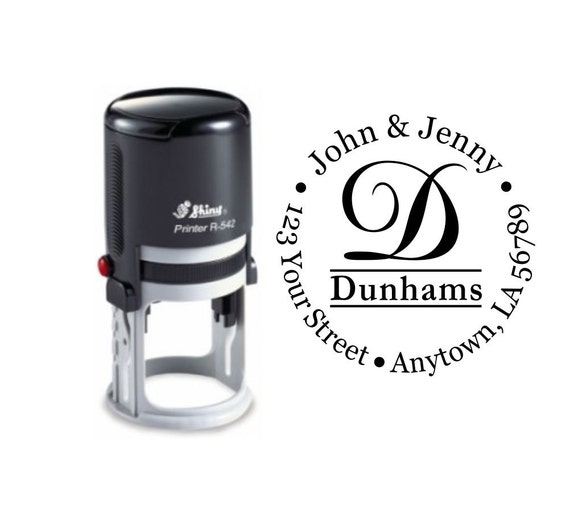
Self Inking custom return name address rubber stamps gift R28
They'll stamp your thank you note extra straight. Self-inking address stamp here


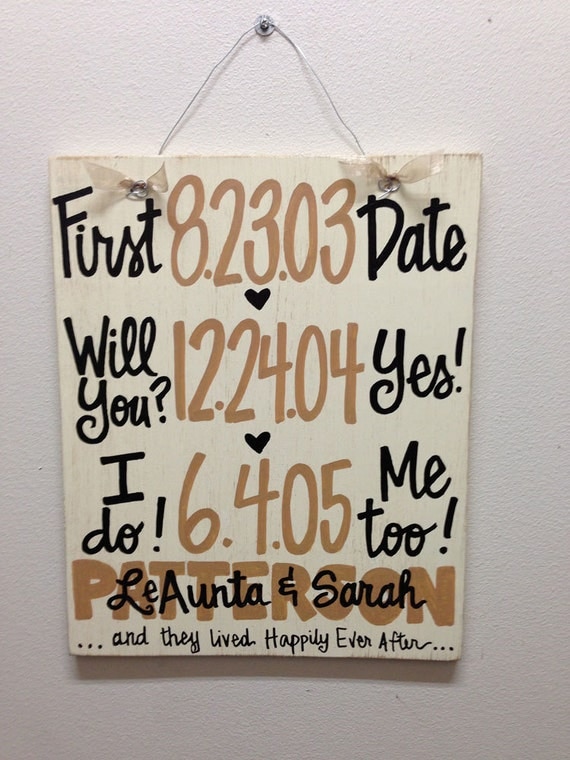
The gift of their love story

Custom Hand-Painted Wedding Anniversary Announcement with Dates on 12x15 distressed wood sign gift Valentines Day
Caution, this will cause happy tears. Custom wall hanging here


The gift of chic barware

custom mint julep by Draper James
They'll be pleased as punch!
Classic Mint Julep Cup from Reese Witherspoon's Boutique, Draper James


The gift of a cozy guest room


PB Classic Glass Bath Decanter
 Thirsty guests will be a thing of the past with a water decanter like this from Pottery Barn.
(Add the monogram option for a more personalized gift)


The gift of laziness
Why pass the salt when you can spin it?
Personalized lazy susan found here


The gift of 'Firsts'


Wedding Shower Wine Gift Basket: A different bottle of wine, each with a tag and poem for their: wedding night, first fight, first dinner party, first Christmas, first anniversary, and first baby. (Make it non-alcoholic for the first baby!)
 Break out the cheese plate for this one....A DIY gift with a bottle for each 'first' 
'Wedding night, first fight, first dinner party, first Christmas, first anniversary, and first baby'


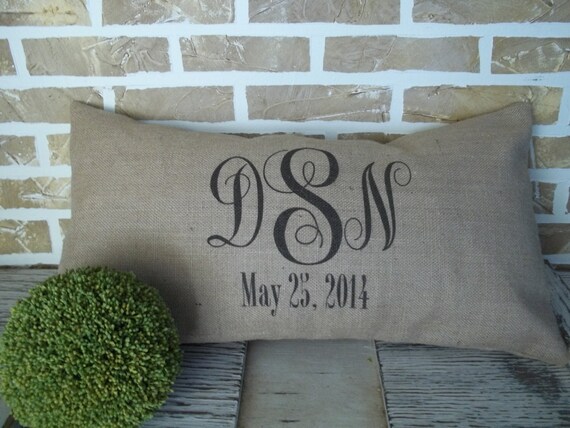
The gift of comfort

Burlap Monogrammed Wedding  Anniversary - with Established Date - Pillow - Insert Included
Personalized pillow for the love birds' nest like this one


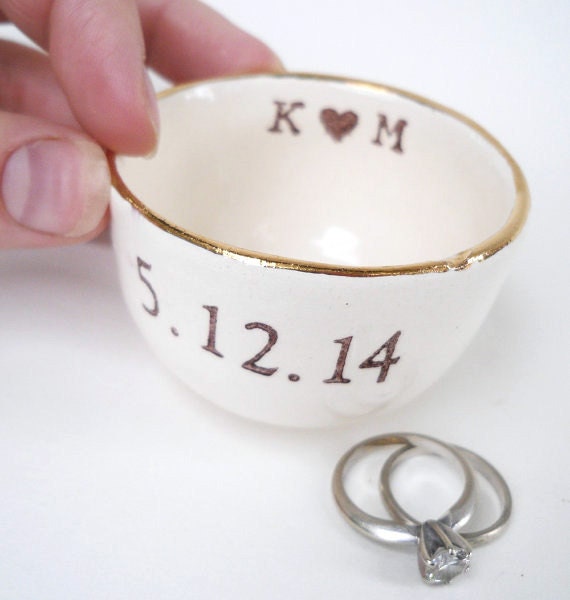
The gift of lost ring prevention

GOLD luster RING DISH wedding ring pillow table decoration party favors bridesmaid and groomsmen gifts personalized names date phrases
One ring to rule them all... unless it's down the drain.
Prevent the couple's first fight with this ring dish


Of course the GREATEST gift of all will be your presence at the wedding festivities, but to secure your seat at the head of their dinner party table, any of these options are a great go-to.


Happy shopping!


Wednesday, April 29, 2015

DIY Pallet Bench


I have like pallets on pallets on pallets right now and have been in search of ways to turn them into furniture or functional pieces.


So I found this....
I don't know who the person is that discovered all the DIY ideas that can be done with old wooden pallets. Whoever you are.....bless you!!!
From here 


...and thought, I can definitely make that. Just cut a pallet in half, add legs, add support and you've got yourself a bench.


Supply list:

For the Bench:
-1 decent, not rotted, pallet
-2x4 left-over pieces in our garage
- 3" wood screws
-Power drill
-Primer (like my go-to Zinsser 123 for all surfaces)
-Paint brush
-Interior Paint + Primer (left over from painting walls in our house)

 For the Cushions:
-3 yards duck cloth fabric ($15) or buy king-size pillow cases you like
-2 king-size pillows (from Ross, $17 for the pair)


Happy crafting!


Cool Trunk Turns Side Table

I love rethinking the use of everyday objects and re-purposing them into something else useful.


I was handed down this really pretty silver and gold trunk and for years I used it as my living room coffee table. Once I had more space, I obviously needed a bigger coffee table and began to brain storm on how I could make use of this trunk. It was too pretty to just put in the closet.


Then I came across this....
DIY- How to turn an old chest into a coffee table. I have an old, This would be a great way to bring it out of my room and put it in the living room. Don't know why I never thought of this before~ great idea
From this blog
 You just add pretty feet to the trunk's bottom and voila! Table. I don't like all my furniture to be super matchy-matchy, but let them compliment each other.  This trunk is perfect for our guest room as a bed side table since the color scheme is pretty, but earthy and a metallic accessory would be the cherry on top.


I used the legs that were cut off left-overs from my crate coffee table project and just so happened to be the perfect height of 4 inches. I attached them with super glue... no lie... and that was that. Super easy, functional for pillow/ blanket storage, and a little metallic flair all in one. You can find wheels or legs at any Home Depot or Lowes and make the table as tall as you'd like.

Had I purchased legs specifically for the trunk, I would've needed to drill holes in the bottom for the legs to screw into and reinforced stability with super glue. I may be doing this in the near future to a couple other trunks I have :)


I hope this inspires you to remake something in your own home

Cheers

Anthropologie Knock Off Wall Hook


Dolls, feast your eyes on this tiny treasure

These raw pyrite hooks from Anthropologie, um, rock!  I could totally see using a few of these in a row to hold keys and that elusive work badge that I always seem to leave at home.

When I saw the price tag of $128, I almost died... which is usually my reaction with anything from Anthropologie, unless it's on super sale.


So I came up with the 2 hooks below for pennies compared to the original


Anthropologie: $128
vs.
Knock Off: $30-$60
(depending on your choice of mineral)


 Depending on what kind of rock/ mineral you choose will make the cost of your project fluctuate. You can find some beautiful samples all over the internet or at a Gem and Mineral show.


To make your own Anthropologie hook you'll need:

-Rock, Mineral of your choice
-Gold jewelry wire
-needle nose pliers
-Wire cutter/ strong scissors
-Iron hook, found mine at Hob Lob for $3 and it was a flat spiral shape which makes a good base for           the rock to lay against
-Gold spray paint
-Hot Glue

Step 1. Spray Paint hook
Whatever color you choose, spray the entire hook front and back and let dry over night so it's perfectly set when you handle it

Step 2. Hot Glue Rock to hook
Position your rock on the hook so that the majority of the backside is as flat as possible to give the glue something to stick to. Set that position by squeezing a generous amount of hot glue on the hook and press/ hold your rock in place for 30 seconds - 1 minute.

Step 3. Fasten Jewelry Wire to rock/ hook
This takes a little coordination. Begin by cutting 5ft (60 in.) of your wire, find the middle by putting the 2 wire ends together and pinching downward. With your hook laying face-up, lay the middle of the wire right under the base of your rock and wrap criss-cross-style around the hook at least 4 times. twist 3 times, like a twist tie, to make a stable base.

Now, begin looping your wire around the hook and rock in a criss-crossed X- style while keep tension. Right side over and around, then left side over and around, then right... left.... etc... until you feel the rock is secure against the hook and will not shift. I used my needle nose pliers to pinch the wire around the rock in some places to better secure it.

Step 4. Hang hook
Hang your hook with a drywall screw for best results. You could even attach them to a long piece of pretty cut wood for a towel/ hat/ or key rack or by themselves as pictured above.


Happy crafting!